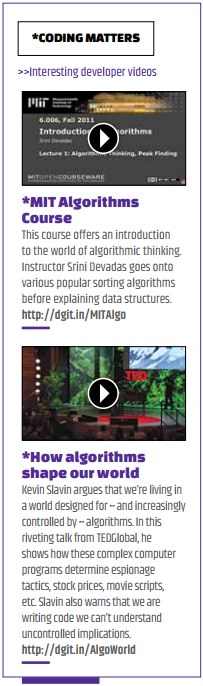
Vim, a relic from the past? Or a tool that stood the test of time? There are those who swear by it and then there are those view it as crazy.
Are you frustrated with your current editor? Not able to code as fast you can think? Worry not cuz’ we’ve got you covered with this amazing guide to the best editor in the world, Vim(You heard that right, emac).
WHAT IS VIM AND WHY SHOULD I LEARN IT?
In the 1970s, computer screens didn’t have a GUI and had very low refresh rates. So low in fact, that single keystrokes took whole seconds to register. Developers found that frustrating to work on with normal text editors. Something about necessity, mothers and invention and Voila! Vim was created, a text editor that could do extensive editing with just a few keystrokes. How does it do that? Well, Vim is what one calls a modal text editor which basically means, it has different modes that assign different functionality to the keys. In conventional text editors, there is only one mode where the keys input text and some keys perform functions when used in conjunction with the control key. In Vim, that is just one of it’s many modes called “insert”. Other modes have different bindings to the keys. For example, “x” deletes a character in “normal” mode. Combine this with touch typing and you will be spewing code as fast as you can think. If you’ve dealt with Unix systems, you would know that Vim comes installed by default. Apart from that, Vim has a port to almost every platform imaginable. Hence, it would be a one time investment in learning it and you can use it everywhere. Some loyalists have gone a step further and have developed plugins to be able to use Vim in services like, Gmail, web browsers and even iTunes. Additionally, Vim can be hacked and customized, extensively. It has it’s own scripting language called VimL to create plugins. Here are some popular ones – • Fugitive – A Sweet git integration. • Syntastic – Syntax checker with support for almost any language you can think off. • Nerdtree – Adds a tree explorer functionality. • YouCompleteMe – The Autocomplete plugin.The only downside to using Vim is the learning curve steeper than a cliff. But if you’re going to be spend hours every day programming for the rest of your life then learning Vim is the second best investment to touch typing.
VIM STARTER PACK
So you decided to man up and learn Vim? Don’t worry, this guide will cover the basics and will serve as a jumpstart to your journey to mastering Vim.
Initial Setup:
Linux: If you’re on Linux, chances are Vim is already installed. Update to the latest version by running the following. $ sudo apt-get update
Windows
If you have the Windows subsystem for Linux installed, Vim would have been installed by default. It can be accessed via the bash terminal. If you don’t, you could install the executable from Vim’s website (vim.org).
Mac
Vim can be installed on a Mac via Homebrew. If you don’t have Homebrew installed, check out MacVim, the Mac port for Vim. Although it’s an unofficial port, Vim developers themselves recommend it. Once you have Vim installed, you can open a file by typing the following in the terminal. $ vim my_great_code.c To exit Vim, you have these options: :q – quit :q! – quit discarding changes :wq – save and quit
Modes
Vim comes with six modes, “normal”, “insert”, “command-line”,” ex-mode”, “select” and “visual”. Out of which the “normal” and “insert” are the primary modes and what we will be looking at. To know about a mode, type the following when in normal mode. :h name-mode
Normal Mode
In this mode, most of the keys are bound to commands that manipulate text. Press “Esc” to go back to this mode from insert mode. Vim starts in this mode by default which is why you can’t start typing away immediately. This mode is called “normal” for a reason, you should be on this mode most of the time and use “insert” mode only for short bursts of inserting text. This is a core philosophy of Vim and you will understand this in the subsequent sections here.
Insert Mode
Insert mode is used to insert text. Simple as that. Vim provides a variety of ways, depending on different use cases, to enter insert mode. The simplest method is by pressing ‘i’ when in normal mode.
The “Vim” Language
Motions The foremost skill that has to be learnt in any editor is navigation. How do you navigate your way through a document in a normal editor? You move your hand from the keyboard to the mouse, scroll through the document until you find the desired location. In Vim, you use nifty commands called motions to navigate efficiently. Here are a few of the commands – • ‘w’ – Moves to the next word from current cursor position. Alternatively, ‘b’ moves the cursor to the previous word. Vim marks the end of a word with ‘space’ and symbols. In the following snippet, ‘w’ would move the cursor to ‘[‘ not ‘i’. To make Vim treat only spaces as end of line, use ‘W’ (shift+w).int array [5] is an array;‘f’ – Requires a character to be specified after the command. This command moves the cursor to the next occurrence of that character from the current position of the cursor. In the case below, typing fg, will move the cursor to “n” which is right before “g”. string mystring = (“hello world”); • ‘/’- Requires a string. Searches for the next occurrence of the specified string. After that, typing ‘n’ will go to the next occurrence and ‘N’ will go to the previous occurrence. This works similar to the “find” feature found in most editors. However, this command can take in regexp as well. For those who don’t know, regexp is an acronym for regular expressions which is a standard syntax to depict patterns. • ‘$’ – Moves to the end of line, • ‘0’ – Moves to the beginning of line. • ‘h,j,k,l’ – Moves left, up, down and right by one character from current position. The newer versions of Vim support the arrow keys, but these are recommended as they are in the home row. The motions can be preceded by a number, which will repeat that motion that many times. For example, 5fa will move the cursor to the 5th occurrence of ‘a’ from the current cursor position. For the full list of motions, type :h motion.txt The document is opened in Vim, therefore you can use the motions you learnt to navigate through the document. You can also get help for a specific command, like:h w The above command will open the motion section of the docs and scroll to the definition of the ‘w’ command. Manipulation of text Now that you know how to find your way through your code, let’s find out how to edit text. The commands to manipulate text can be split into action, modifier and motion. It’s alright if it’s a bit overwhelming; we’ll look into examples to clear the concept. • Motion – We’ve already covered this in the previous section. Motion specifies the text to be manipulated. • Action – This module specifies the action that must be run on the text. The basic ones are – › ‘d’ – delete. Deletions are stored to the clipboard. Hence, no dedicated cut function. › ‘y’ – copy, the abbreviation was derived from yank. ‘p’ pastes whatever has been copied › ‘c’- change, deletes the text and enters insert mode. The semantic is that it ‘changes’ the text. • Modifier – modifiers extend the text specified from the motion. The numbered motions which we saw earlier are examples of modifiers. Other important modifiers are – › ‘i’ – inside › ‘a’ – around Example commands to illustrate the modular syntax: • ‘dw’ – deletes from the current cursor position to next word. • ‘yiw’ – copies the word under the cursor. It’s that simple! Now, if you learn some new motion, you’ve learned how to do 3 more operations in Vim. This concept is best explained by expert developer, Mike Kozlowski, “This philosophy of minimalist commands that can be composed together is the fundamental originating philosophy of Unix, and Vim exemplifies it like no other editor.” If this is difficult to grasp, picture the syntax as a language, where actions are verbs, modifiers are adjectives and motions are subjects. To repeat a command, just use ‘.’ instead of typing out it again. Now that you’ve learned a bit, go get your hands dirty. In case you messed up, here are two useful commands to undo – • ‘u’ – The “ctrl-z” of Vim. • “:earlier 10m” – Goes to the state of the document 10 minutes ago. You can use ‘s’,’h’ or ‘d’ instead of ‘m’ to move back in seconds, hours or days respectively. CASE STUDY Let’s say you have a variable whose name you want to change to something more descriptive. Enter ‘/var’ to search for the first occurrence of “var”. 2. Use ‘cw’ to change it to “variable”. 3. Tap ‘n’ to go to the next occurrence and ‘.’ to repeat the last edit. This is similar to the “find and replace” function present in many editors. However, there is a problem. This command will also change the notvar variable. Earlier, we discussed that / also supports pattern matching with regexp support. Just type \(the regexp for the word var” instead and Vim will ignore the undesirable case. This is a much faster and cleaner method compared to the “find and replace” function, where you would have to manually skip the undesirable cases. An EVEN faster way to do this would be with the following command :%s/\/variable/g That’s it! This one line is all that is needed to do the job. We’ll let you figure this one out yourself (HINT: Enter :h substitute). GOING FURTHER That’s all folks! Pat yourself on the back, you’ve now successfully learned the basics of Vim. There are thousands of resources out there from where you can further your knowledge. The best one is probably Vim’s own documentation which you can access with a simple ‘:h’. ProTip: Spend five minutes every day going through the documentation, learning and memorizing one new command and in no time you’ll be an expert at this. Vim is frustrating at first, but that’s only because you’re relearning how to type. Patience is key. Alternatively, you can use the GUI versions of Vim so that you can gradually slip into the Vim philosophy. They support the mouse and work like a conventional editor. Initially, you will use the familiar mouse to select text and “ctrl-c” and “ctrl-v” to copy and paste. Then, gradually you will begin using yiw and p, instead. There are many GUI versions out there, but the best ones are gVim for Windows and Ubuntu and MacVim for macOS. Try them out and let us know how it feels.