Google’s new mobile application development SDK
ave you ever wondered how easy things might have been if mobile developers could build applications for several platforms from just one single code base?
Fascinating isn’t it? Developers could just dedicate their time to focus on the code they want to create or the logic they intend to build without letting
their mind be clouded by the impositions of environment/operating system on which the app shall run. Well, worry no more for Google has yet again come forward with a boon for the developers in the form of Flutter.
Flutter allows you to build beautiful, native apps on iOS and Android from a singular codebase. In other words, the code that you write once shall be taken care of by Flutter to suit both Android and iOS, two of the most widely used mobile operating systems in the current times.
Google claims the four tenets of Flutter to be beautiful, fast, productive and open. To have an understanding of how fast Flutter can be, it’s good to know that Flutter compiles directly
to ARM code without any scripts to parse. To justify its openness, Flutter is not just open source but it allows us to build on top of applications and frameworks on it.
One of the most amazing aspects of Flutter is the functionality of ‘Hot Reload’ in which all you need to do is to save the app and hit refresh to let the modified code work its way and display play the changes made to the app itself in a matter of few milliseconds which can almost be thought of as refreshing a webpage. Imagine the amount of time that can be saved and also the difference this brings to the usual way of modifying code to see the changes implemented where several files had to be recompiled.
Flutter allows building vector animations at every frame which aren’t essentially mistaken to be precomputed gifs and they run at 60 frames per second. At its core, Flutter uses DART as its programming language,which was also developed by Google a long time back. It didn’t receive much
popularity back then but it’s back into relevance with the advent of Flutter. Flutter uses widgets, which are the basic building blocks of most web or mobile app these days. They comprise the UI elements that we see on screen and offer minute or specific controls inside the app. Flutter provides for
stateful and stateless widgets. According to Flutter, a stateless widget is one that does not involve a change in its state whereas a stateful widget maintains information of the state which
are subject to change. Essentially, a stateful widget retains state informa-
tion and a stateless widget does not. With this insight on Flutter, let’s have it installed on our computers. It is a fairly easy process for both macOS and Windows users with a slight snag
for the latter to which we shall get into steadily. We’ll discuss the process for Windows here. For macOS, it’s even easier than the Windows one..
Things you’ll need
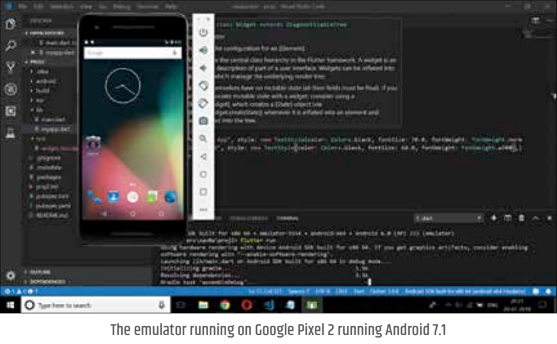
The first thing that we shall need is our very own command prompt terminal or a suitable alternative to that,preferably the git bash for executing certain flutter commands which aid this process. We also need to get the Java SDK installed and set the path to the bin folder of the directory in which Java was installed. We then need to consider whether we would be testing out our Flutter code in a real Android device ( a smartphone) or a virtual emulator such as the one that the Android Studio provides. In case of the latter, we need to install Android Studio which sets up an emulator for Android. The emulator used for building a small application has been run on a Google Pixel 2 running on Android 7.1 (Nougat). A point to be noted is that we can, of course, write code for iOS and expect them to run
perfectly but in Windows, we cannot set up an environment for iOS to run. For Android Studio, we’ll also need to set the ANDROID_HOME to the folder where the Android SDK resides which can be done from the command prompt or the git bash. FLUTTER It is now time to install Flutter.
1. Download the following installation bundle to get the latest stable release of the Flutter SDK: flutter_windows_v1.0.0-stable.zip
2. For other release channels, and older builds, see the SDK archive page for more information.
3. Extract the zip file and place the contained flutter in the desired installation location for the Flutter SDK (eg. C:\src\flutter; do not install Flutter in a directory like C:\Pro-gram Files\ that requires elevated privileges).
4. Locate the file flutter_console.bat inside the flutter directory. Start it by double-clicking.
You may also want to run Flutter from the command prompt or the git bash for which the path in the
environmental variable needs to be set. You would also want to set the path to the bin folder inside Flutter for it to be executed from any location in your PC.Execute the command flutter doctor to check for platform dependencies. Once settled, run the command again to verify the process. A simple
run of the flutter doctor with the -v command flutter doctor -v looks like the image included below.
IDE
Next in queue, we shall require an editor, yes, the IDE! You can go for anything lightweight such as the Sub- limeText or the heavyweight IntelliJ
IDEA to suit your dark/light themes which make you feel well-at-ease while you code. However, today we shall be talking of the VSCode (Visual Studio Code) editor. It’s a pretty lightweight editor (https://dgit.in/VSCode) that features most of the utilities you’d want from an excellent IDE and more. Here is a list of plugins that we’ll need.
1. DartCode – an extension for the programming language that will be used to build the apps
2. Flutter 2.18 – an extension of the SDK itself that allows itself to be recognized by the IDE Here are a few more extensions that you may want to use to finetune your Flutter experience
1. Flutter widget snippets by Alexis
2. Dart Snippets
DART
Now that we have VSCode, let us know a bit about DART. I am pretty sure that many of you haven’t heard of this language before. Well, neither did I before I found out about Flutter, and that has been the way for many. The features of DART aligns itself to the interests of Flutter in several ways.
Dart uses JIT(Just in Time) compilation during development of code, thereby leading to faster development cycles. JIT is a feature found in dynamic programming languages that are executed by an interpreter and doesn’t compile directly into machine code. Dart also uses AOT (ahead of time) compilation to native code (iOS or Android) when the application is ready for release. The ahead of time compilation is seen in static languages like C, C++ where the language specific code is compiled directly into machine /native code. Although essentially being a slower process, it carries the potential of executing more predictably without scope for any runtime anomalies.
This leads to faster execution of programmes that use AOT. Dart, being able to use both, invariably puts itself in an advantageous position of being used for Flutter. Quickened development and faster startup is what we get from using Dart, thereby leading to a very expeditious app development. One of the biggest highlights of Dart would definitely have to be the ‘Stateful Hot Reload’. Press a key-combo
only to see your entire code being compiled, modified (if any) and refreshed with the changes in place, all of it up and running in a time of milliseconds.We love this for its trailblazing speed! This has been and will be a boon for all the developers out there who have had to patiently stand by the clock to see their code be deployed. Not anymore though, with this state-of-the-art groundbreaking speed that the hot reload brings. The state of the app is stored at every reload and can be picked up from where it had been left.
Using Dart, we can create animations that run with smooth finesse at 60 frames per second, thereby
ensuring the best user and developer experience. Dart also manages to add to its arsenal the mechanism of object allocation and garbage collection without the use of locks. Fascinating,
isn’t it! If you want to know more, read about it here: https://dgit.in/Flutter.
To put in brief, Flutter uses threads called isolates that are not run preemptively, thereby not allowing the sharing of memory leading to no such situation where problems such as deadlocks might occur.
DIY
It’s time we get into what Flutter can do and probably try it for ourselves. We begin with importing of pack-ages. Yes, C++, Java or any other object oriented programmers, you’ve started feel comfortable, haven’t you? Don’t worry. We aren’t not going to take you out of your zone either. You’ll be able to breeze through it. And for others, all this needs is a bit of focus. Think of importing packages to be
adding a few necessary files to your code that you shall have to use more often. In our case, we shall import a class called material.dart among other classes that comes with the default flutter package. As usual, we can also import classes through packages which have been written by us as well. Material is a visual design system which can be coded in open source and off late has become a standard for mobile and web applications widely accepted and lauded by developers. Next up, we need to define create our main function which serves as the starting point for the execution of the app. It is
also the place where we define or call several other methods and/or widgets. We do that in a file called main.dart which gets built whenever we create an application from the menu and it resides inside the lib folder.
We create another file with any name that we prefer, say, myapp.dart.
After we are done with this class, we shall call it from the main.dart. Since we shall use the material widget, we go ahead and import that. We define the class as FirstApp and we extend the StatelessWidget to keep things simpler since our app isn’t going to keep transitioning between states. Go ahead and type some more, and at this point, let us understand that we shall return a new object of the Material
class, i.e., the object which shall be our app itself. Let’s use some properties,
which you can think of to be variables, to give FirstApp some identity.Let us understand the code over
at https://dgit.in/Flutter1. This bit of code essentially describes the part of the UI that the widget represents. What this does is replace the subtree of widgets (widgets, parents and their children with furthermore nesting results in a tree like structure) by updating the existing nested widget tree or by removing and placing itself as the new subtree provided the widget returned can update the root of the existing tree. Through this method the existing context of the widget is passed as a object of the BuildContext Class and after being modified it’s returned at its correct position in the widget tree. We can set the color like this. color: Colors.red; The body consists only of a simple text defined inside a text widget.
We can also define a child (or children in cases of a list) to any widget.
This feature allows nesting (similar to the way we looped inside loops) and we can go into any amount of detail until we are satisfied. For every child, we instantiate a new widget which necessitates the usage of the new keyword. Let us add a new inkwell widget as a child to the Material widget in which we are in right now. An inkwell
widget responds to a touch in a rectangular area on the screen. child: new InkWell(….) Let’s nest another widget here called the column widget which can be used to list multiple objects. As you might have guessed it’s going to have children in here and likewise the syntax is children. While setting a children property, we need to place the Widget class in angular brackets much like our generic classes in java. We can add as many records/rows to this column, each record being capable of holding any kind of widget. Let’s add two text widgets. Dart allows us to control styling, colors, alignment, sizes – almost anything that you can think of. At any given point of time you
might as well feel that you’re developing an HTML or a CSS file. Check out the code at https://dgit.in/Flutter2.Having done this much, let’s go back to the point where we’ve just stepped into the inkwell widget. We are going to make something aesthetic here with the use of ontap function.
With this, everytime that we tap into the screen, the screen shall give us the fancy tap animation that looks like an oval texture swipe. We may also provide some activity to be done every time the screen is tapped, as shown here: https://dgit.in/Flutter3. Well, now that we have quite a
handful of stuff coded, we can run the application by typing out flutter run in the terminal.For every other app reload, we can press r to do a quick hot reload without reloading the state of the
app, which can be done if we do a hot restart command with a R. And this brings us to the end of this
little project that we’ve been trying to build. In brief, this code imbibes a material type design, of course very simple,and prints some text. Title, application bar and in the body. The concept of nesting is explored a bit that offers insight on what Flutter treats as a child and children. A fancy UI function and a bit of playing around with the text. Of course, Flutter has a lot more to offer.
Having done this much, let’s go finish it up by writing our main function as shown here: https://dgit.in/Flutter4. At the very first we import our material class that we’ve used and we’re going to use the MaterialApp widget
here in the main (unlike the Material that we’ve used in myapp.dart) The rest of it is simple enough. We import myapp.dart as well. Inside our main, we use the runApp function to run this application. Since we haven’t defined yet what our app is going to be, we instantiate a new object of the MaterialApp widget which is going to wrap up our FirstApp widget inside
the home property. Feel free to check out https://flutter.io/docs and immerse yourself. We are positive that you are going to find it very fascinating easy and beautiful to work with.
Sources
• https://dgit.in/FlutterSource1
• https://dgit.in/FlutterSource2
• https://flutter.io/
• https://medium.com/