JavaScript libraries and frameworks come and go, but with Facebook behind one, you have to take notice; and the world did. React is in active development and already in use by major websites like Imgur, Netflix and Scribd. React is unique, perhaps even groundbreaking, and definitely controversial in a number of ways as you’ll discover as you read along.
What is React?
First and most important, know that React is a library that aims to do one thing, but do it well, the UI. To solve other parts of the web development equation, you’ll need to look elsewhere.
Is it the next big thing in web development?
Also important to know is that React is very fast thanks to its use of a Virtual DOM technology – we’ll look at that in a bit. React also heavily encourages you to use an enhanced version of JavaScript that it calls JSX. Finally React is oriented around components. All you do with React is create a hierarchy of components that work with each other.
For instance you could create a toolbar composed of Button Bars, composed of Buttons etc.
JSX: XML-Rich JavaScript
JSX is JavaScript with an enhanced syntax for declaring components using XML tags directly in code – you’ll see this in action soon. Since this isn’t standard JavaScript, you need to compile to the equivalent JavaScript before it can be loaded by the browser.
This compilation can be performed in the browser itself by including the Babel compiler along with your JSX scripts on your page. The preferred way, especially for production is to compile them in advance. It’s also entirely possible to use React with a pure JavaScript syntax if you want, however JSX is definitely the cleaner, simpler and clearer route. If you do use JSX, you can also begin using the latest JavaScript features and syntax since the Babel compiler will also convert those features to work with current browsers.
The Virtual DOM
The DOM, or the Document Object Model is a convention for rich object-oriented iterations with a document. In case of browsers the DOM is what let’s you manipulate the HTML content of a page. The is essentially how JavaScript is able to provide any kind of interactivity. The problem with it though is that performing a large number of operations on a page can be really slow, especially if done inefficiently.
The virtual DOM is the magic behind React’s great performance. React maintains its own fake / mock / virtual DOM in memory where it performs all operations. It then compares this to the actual DOM, and makes the minimal changes required to bring it up to date with the virtual DOM.
By batching these changes React can also ensure that there is no unnecessary rendering of intermediate states that you wouldn’t want the user to see anyway.
Setting up a React App
React is composed of two main JavaScript files ‘react.js’ and ‘react-dom. js’ that provide the bulk of the functionality. These are all you need to include in your HTML page to use React.
If you want to use the JSX syntax, and want it to automatically work in the browser you need to include the Bable compiler. Your JSX code can be included like any other JavaScript file, with just the type attribute set to “text/babel”. This is very useful while testing. We will also include jQuery to simplify communicating with other services.
To quickly get you started, we have created a project with everything set up at http://dgit.in/ReactTutorial. You can click on the Remix button to make your own copy of the project and edit it online. You will see a folder for each step of the project with individual HTML and script files. You merely need to edit the “script.js” file. Here you can also click on the “TUTORIAL” tab for more instructions. Over the rest of this article, we will be building a React application that uses the OMDb (The Open Movie Database) API to search for movies.
Our First Component
The simplest React component need only a method called render that returns the content to display. For example:
var Movie = React.createClass({
render: function() {
return (
<div>
<h3>12 Angry Men</h3>
<p>Year: 1957</p>
</div>
);
}
});
Note how we are directly using an HTML-like syntax to build out UI. We can do this because we are using JSX and the compiler will convert this to pure JavaScript. To see the equivalent JavaScript code, you can type this code into the Babel REPL online at https://babeljs.io/ repl/. You’ll see how better off you are using JSX for React.
The above code alone will show nothing in the browser. It creates a component that subsequently need to create an instance of to display. This is simple enough:
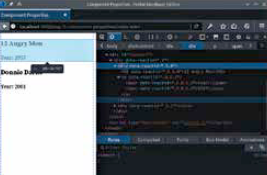
If you look into the actual DOM at this point you will see a lot of the stuff that react has added to keep track.
ReactDOM.render(<Movie />, document.getElementById(‘content’));
See how we are now using Movie like a tag as if it were any other HTML tag. You can also use this with existing HTML tags like div, span, and a. This is what React is all about. We could also do the above as:
var movieInstance = <Movie />;
ReactDOM.render(movieInstance, document.
getElementById(‘content’));
The second parameter provided to ReactDOM.render is a direct reference to the DOM node where you wish to inject your component. For this to work there needs to be a tag with an id of ‘content’ in the body of your HTML document. The project we have set up for you already has this.
Now you should be seeing something on the screen. Next we’ll see how we can supply the movie title and year to a movie object rather than having it hard coded. We can do this with properties.
Component Properties
Component properties allow us to initialise a movie component as follows:
<Movie title=”12 Angry Men” year={1957} />
This is again similar to HTML tags except that we are also using curly braces. These allow you to pass variables, numbers and complex data objects. Here by putting “1957” in curly braces we are passing it to the component as a number rather than a string. In our particular case it doesn’t matter though. Now we can modify the component to use these properties rather than hard-coding them:
var Movie = React.createClass({
render: function() {
return (
<div>
<h3>{this.props.title}</h3>
<p>Year: {this.props.year}</p>
</div>
);
}
});
Any properties you provide are made available via the props object on the component object.
Here you can see how we initialise two different Movie components, and place them in a div:
var movies = <div>
<Movie title=”12 Angry Men” year={1957} />
<Movie title=”Donnie Darko” year={2001} />
</div>;
ReactDOM.render(movies, document.getElementById(‘content’)); Properties allow you to pass data and configuration to components but it’s very important to note that these properties are never supposed to be modified by the component. React components have a different mechanism, called states that are designed to be modified by the component.
Component State
To show how we can use states, we’ll create a simple component that toggles between an empty and a full star. This can be useful to mark something as favourite or important.
This component will need a state called starred is toggled whenever it is clicked. In react the way to do this is to set up the initial state using the getInitialState method, and then modify the state using setState.
var Star = React.createClass({
getInitialState: function() {
return {starred: false};
},
star: function() {
return this.state.starred ? “\u2605” : “\u2606”;
},
handleClick: function() {
this.setState({starred: !this.state.starred});
},
render: function() {
return (
<div onClick={this.handleClick}>{this.star()}</
div>
);
}
});
ReactDOM.render(<Star />, document.
getElementById(‘content’));
There is a lot going on here, so let’s break it down. The getInitialState method of Star returns the initial state of the component. The render method is a simple div that has a click handler which we have bound to the handleClick method, and the body of the div is returned by the method star.
The handleClick method is simple. It just toggles the starred state between true / false. Using setState causes the component to automatically be re-rendered with the new state. The star method returns the Unicode symbol for a full star or empty star based on the starred state variable.
We also render the Star component on the page. This should display a single empty star that toggles between full / empty when clicked.
You could now include <Star /> in your Movie component and get this component as part of the Movie component. Right now this isn’t useful because the Movie component doesn’t know the state of the star. This problem is fixable and hopefully when you’re done reading you’ll know how.
Right now though let’s start by creating a MovieList component. MovieList Component While our Movie component takes a single movie and renders it, the MovieList component will take an array with data about many movies and render each using the Movie component:
var MovieList = React.createClass({
render: function() {
var movielist = this.props.movies.
map(function(item) {
return (<li>
<Movie
title={item[‘Title’]}
year={item[‘Year’]} />
</li>);
});
return (<ul>{movielist}</ul>);
}
});
In the render function this component uses the Array map method to create a Movie component for each movie data item. The reason we have the movie title set to {item[‘Title’]} is that, that is the format in which the API we are using returns data.
The final two piece in our puzzle is a search box that we can use to perform queries. However we well also need some way to connect everything together. For that we will create yet another component, for our main app.
Once you know enough react, you could link together five star components to create a ratings widget.
The SearchBox Component
This is another simple component, but it introduces some new concepts that you will find useful. Let’s have a look:
var SearchBox = React.createClass({
handleSubmit: function(e) {
e.preventDefault();
this.props.queryChange(this.refs.query.value);
},
render: function() {
return (
<form onSubmit={this.handleSubmit}>
<input ref=”query” />
</form>
);
}
});
As you can see from the render function, this component returns a simple form with just a single text input field. What’s going on under the hood though is a lot more interesting.
Let’s start with the render method, where you’ll notice that we have added a ref attribute / property to the input element. You’ll also notice that we have set the handleSubmit method as the submit event handler for our search form. This method will be called when someone enters some text in the input box and presses enter.
The handleSubmit even handler itself first uses the preventDefault call to stop the browser from triggering the default form submit action, which would refresh the page.
When you add a ref=”name” property to an element in the render method, it allows you to quickly get a reference to that property using this.refs. Since we gave our input field a ref of “query” we can now access it as this.refs.query.
Here we are obtaining the value of the input field, and passing it to the queryChange function that seems to be a property as it is available in the this.props object.
Instead of listening for form submits, you can listen for text change events get live search results.
What this means is that when we create an instance of this Search Box component, we will need to provide a function via the query Change property. This function will then by called when the query changes, and will be provided the query string.
Connecting Everything
Now we need to create one final component that will connect everything together. Since we’ve already done a lot of the heavy lifting inside the application, the main app is quite small:
var App = React.createClass({
getInitialState: function() {
return {data: []};
},
handleQueryChange: function(query){
var url = “https://omdbapi.com/?type=movie&s=” + query;
$.get(url, function(data) {
this.setState({data: data[‘Search’]});
}.bind(this));
},
render: function() {
return (<div>
<SearchBox queryChange={this.handleQueryChange} />
<MovieList movies={this.state.data} />
</div>);
}
});
The render function is quite simple thanks to our existing components. It simply includes the SearchBox and MovieList components. The query- Change property of the SearchBox is bound to the handleQueryChange method of our component and the movies property of our MovieList is bound to the data stored in our state.
When someone submits a query using our SearchBox component the handleQueryChange method is called. This method is provided the submitted query, and this method in turn uses the OMDB API get the movies matching the query. Here we are using jQuery’s convenient Ajax APIs to perform the query. The OMDB API returns a JSON document with a single Array called “Search”. Here we extract that array and use set- State to update the data to be displayed by our component. Using
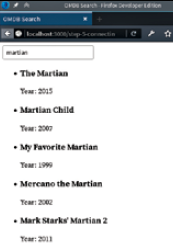
setState to change the data automatically refreshes our component with new data. At this point you have a fully working React-based application for searching for movies using the OMDB API and displaying the result.
Next Steps
Hopefully you’ve seen how easy it is to combine different components in React to work together and create complex UIs, and how easy it is to reuse the components you’ve made.
React’s component model is generic enough that it is also usable for building native applications with React Native and graphicsdriven apps with react-canvas.
Of course with the Virtual DOM being a core part of React, you can also expect better performance that most other similar UI libraries and frameworks. In fact since the DOM is virtual, it’s even possible to render React components to HTML on the server side.


