Get the app
Prototyping on Pixate happens in real time with all your changes being updated onto the app as soon as they’re made, so you can reduce the time spent on prototyping your app. Simply download the app from the Play Store or the App Store and sync it with your PC / Mac.
Begin prototyping
Start off by importing all your assets into the assets panel. Always make an image which would be representative of how your final app looks like and use that as a base layer to figure out where to place all the individual elements of the UI.
Adding animations
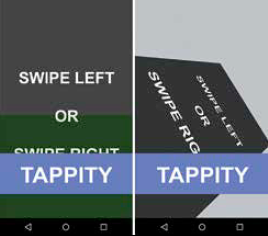
Let’s start off by dragging an image (let’s call it Button.jpg) onto the screen and giving it the properties of a button. Tap sets into motion an animation. So you can simply drag the ‘tap’ interaction from the interaction menu and drop it onto the image within the workspace, or drop it onto the specific layer in the layer panel.
There should now appear a new property in the panel that indicates that a Tap action has been added to the layer. Now you need to drag and drop another image (let’s call this one Screen.jpg) onto the workspace. Reorder the layers so that the Button.jpg layer is on top of the Screen.
Tap to rotate in action
Moving between screens
Once you’ve gotten a hold of how animations work, you need to figure out how to switch between different screens. This is achieved by reordering and is ideally done simultaneously with an animation. When an animation on a layer has run its course, it still remains in its initial position. So all actions are still captured by the top most layer. In order for a newer layer to perform any action, the user should be able to interact with it directly and this is why you’d want to reorder the layers such that the new layer comes to the very top.
Reordering is just as simple as adding animations. Drag and drop the reorder animation onto whichever layer you wish to move and select the “Based On” parameter. Then select where the layer has to be moved to. You can choose to send it all the way to the back or bring it to the front. And if you prefer a more specific position, you can slot the layer behind/in-front-of element on the workspace.
Grouping
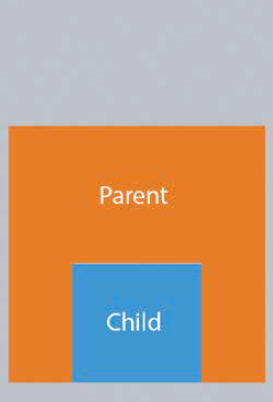
And now for something slightly complicated. Grouping layers allows you to work out some interesting effects. Here’s how you can achieve parallax scrolling using grouping. Start off by creating two different layers with one layer being slightly smaller than the other. Drag the smaller layer onto the larger layer to nest it. You now have a parent layer and a child layer. And now, like we’d done earlier, you need to add a “Drag” interaction to the parent layer and pick ‘Vertical’ from the properties menu for drag limiter.
For parallax scrolling, you need to have one layer moving at a slightly greater pace than the other. In this case, the child layer will be made to move at a faster pace so that it comes into view and exits fairly quickly. So you need to add a move animation to the child layer and link its animation to that of the parent. Select the parent layer under “Based on” and for the trigger, select “Drag Position”. Under animates, select “Continuously with rate”. Now, the child layer will move in unison with the parent layer, so to change the pace, modify the “Rate” to 1.5 and you’ll see the child layer zooming past the parent layer. If you want the child layer to not pop out of the confines of the parent layer, then simply select the parent layer and modify the “Clipping” property to ‘bounds’. The child should now be visible only when within the bounds of the parent layer.
Go crazy!
These were just some basic examples for you to get started with Pixate. You can find more of these simple tutorials over at Pixate’s official tutorial page and if you’re in the mood for something a little more complex then you might want to check out this video to figrure out how to build a Twitter prototype. http://dgit.in/PixateTwitter


